

Are you a DIY enthusiast looking to tackle your Suzuki Swift's alternator removal? You're in the right place! Whether you're facing battery issues or want to upgrade to a more efficient model, understanding how to remove and replace your car’s Suzuki Swift Alternator Removal can save you time and money. In this easy-to-follow guide, we'll walk you through each step of the process, from gathering the necessary tools to reinstalling with precision. With clear directions and helpful tips, you'll gain confidence as you work on your vehicle like a pro. Let’s rev up those engines—it's time for some hands-on learning!
Tools and Equipment Required
Before diving into your Suzuki Swift alternator removal, gather the necessary tools and equipment. Having everything at hand makes the process smoother and more efficient.
Start with basic hand tools: a set of sockets of various sizes is essential for loosening bolts. A ratchet or breaker bar will help you apply adequate torque without straining your hands. Don’t forget to include an extension bar; it can reach those tricky spots that are hard to access.
A wrench set is also crucial. Combination wrenches allow better maneuverability around tight spaces, while adjustable wrenches provide versatility for different bolt sizes. Having these on standby means you're prepared for any challenge thrown your way.
Next, grab some safety gear, such as gloves and goggles. Protecting yourself from debris and accidental scrapes is vital when working under the hood of your car. Safety should always be a priority during DIY projects.
Consider having a multimeter handy if you're troubleshooting electrical issues related to the alternator. This tool helps ensure all connections are functioning correctly before removing components, giving you peace of mind as you work through this project.
Safety Precautions Before Starting
Before diving into the Suzuki Swift alternator removal process, it's crucial to prioritize safety. Working on your vehicle can pose risks if proper precautions aren’t taken. Start by ensuring you have a clean and well-lit workspace. This will help you see clearly what you're doing and prevent any accidents from occurring.
Always wear appropriate personal protective equipment (PPE). Safety glasses protect your eyes from debris, while gloves can help shield your hands from sharp edges or hot components. Don't underestimate the importance of sturdy footwear; closed-toe shoes are essential for protecting your feet.
Disconnecting the battery is a must before starting any electrical work on your car. Turn off the engine and remove the negative terminal first to avoid accidental shocks or short circuits during alternator removal.
It’s also wise to keep tools organized and close at hand. A clutter-free environment reduces distractions, enabling you to focus more effectively on each step in the process. Additionally, being mindful of where small parts go ensures they won’t get lost when reassembling later.
Familiarize yourself with basic automotive safety protocols before proceeding with any repairs. Knowing how to handle tools properly helps mitigate potential injuries while giving you more confidence as a DIY enthusiast tackling this project.
Locating the Alternator in Your Suzuki Swift
Locating the alternator in your Suzuki Swift is a crucial step for a successful DIY repair. This compact car has its engine bay designed efficiently, making it relatively straightforward to locate key components.
Begin by opening the hood and securing it with the prop rod. The alternator is typically located on the front side of the engine. It’s usually positioned near the top, bolted onto one side of the engine block, making it accessible yet somewhat tucked away.
If you look closely at your engine, you'll notice several belts running around various pulleys. The alternator will be attached to these belts, which help power it, as well as other components such as the air conditioning and power steering. Familiarising yourself with this arrangement can save time during the removal process.
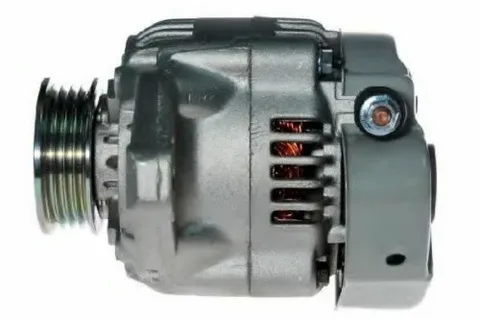
Look for a round metal unit that resembles a small cylinder or drum connected to these belts. It often features electrical connections and a fan-like cover at one end for cooling purposes.
Once you've identified this vital component, ensure you have adequate space to work around it before proceeding with removal steps. Having good lighting will also help illuminate any tight spots where visibility may be limited during the alternator replacement process on your Suzuki Swift.
Identifying Key Components for Removal
Before you dive into the Suzuki Swift alternator removal process, it’s essential to pinpoint key components that need to be dealt with. Understanding these parts will streamline your task and make it a lot easier.
Start by identifying the electrical connections attached to the alternator. Typically, you'll find two main cables: one is for power, while the other is a ground connection. Make sure to take note of how they are connected so you can reattach them properly later.
Next up, look at the mounting brackets securing the alternator in place. These bolts hold everything tightly together and must be removed for a successful extraction to occur. Use your socket wrench set for easy access; it's often best to tackle these from various angles.
Don’t overlook any belts that may wrap around your alternator! The serpentine belt, also known as the drive belt, could pose an obstacle during removal if not addressed first. You’ll want to release tension on this belt before proceeding further.
Identify any additional components nearby that might obstruct your path—like hoses or wiring harnesses. Clearing away these elements will create more space and reduce the potential for damage during removal efforts.
Step-by-Step Guide to Removing the Suzuki Swift Alternator Removal
Removing the Suzuki Swift Alternator Removal is a straightforward process when you follow the proper steps. Start by disconnecting the negative battery terminal to ensure safety. You don’t want any electrical surprises while working on your vehicle.
Next, locate and remove any covers or shields that may be obstructing access to the alternator. This usually involves unscrewing a few bolts or clips. With these removed, you can see what you're working with.
Now, identify the wiring connected to the alternator. Carefully unplug these connectors, taking note of their placement for easy reinstallation later. It’s best to take pictures if you’re unsure about where everything goes.
Once all wiring is disconnected, focus on removing the mounting bolts and securing the alternator in place. Depending on your model year, there might be several bolts holding it down; use appropriate tools for this step to avoid stripping them.
Gently wiggle and pull out the alternator from its housing once all connections are undone. If it feels stuck, double-check that no other components are still attached before fully detaching it from your Suzuki Swift's engine bay.
Common Challenges and How to Overcome Them
Removing the alternator from your Suzuki Swift can present some common challenges. One of the most frequent issues is tight space constraints. The engine bay can feel like a puzzle, making it difficult to access bolts and connections. To tackle this, use a combination of long-reach sockets and extensions. These tools help you navigate around obstacles with ease.
Another challenge is stubborn or corroded bolts. Over time, rust may form on fasteners, making them nearly impossible to remove using standard methods. Penetrating oil can work wonders here; spray it on the affected areas and let it sit for several minutes before attempting to loosen the bolts again.
Wiring complications often arise during removal as well. Disconnecting electrical connectors without damaging them requires patience and precision. Be sure to take photos as you go along so that you can easily refer back to them when reinstalling components.
Sometimes, the alternator itself doesn’t want to budge after unbolting due to gaskets or seals sticking in place. If this occurs, gently wiggle or tap around its base while pulling upwards carefully—this usually helps break any bonds formed.
Handling heavy parts safely should always be top of mind during your DIY project. Use both hands when lifting out the old unit; consider enlisting a friend’s help if it feels too cumbersome.
Installing a New Alternator with Precision
Installing a new alternator requires careful attention to detail. Start by positioning the alternator into its designated mount. Ensure that it aligns with the mounting brackets and bolt holes perfectly. This initial placement sets the stage for a successful installation.
Reconnecting Electrical Connections
Follow the vehicle's wiring diagram to reconnect all electrical components. Ensuring clean and corrosion-free connections is crucial for optimal alternator performance.
Double-Checking Before Final Tightening
Before securing the bolts completely, verify that all parts are correctly positioned and wired. This step minimizes the chances of issues arising after installation.
Securing Fasteners and Conducting Final Inspection
Tighten all fasteners firmly, but avoid overtightening to prevent misalignment. Once everything is in place, take a moment to review your work before testing the alternator.
Testing and Verifying Proper Functionality
After installing your new alternator, it’s crucial to test its functionality. Start by reconnecting the battery terminals securely. Ensure that there are no loose connections, as this could affect performance.
Next, turn on your Suzuki Swift and listen for any unusual noises coming from under the hood. A properly functioning alternator should operate quietly without excessive rattling or grinding sounds. If you hear anything out of the ordinary, double-check your installation.
Now, it's time to check the voltage output using a multimeter. Please set it to DC volts and connect the leads to the battery terminals while the engine is running. You should see a reading between 13.7 and 14.7 volts if everything is working correctly. This indicates that your alternator is charging efficiently.
Additionally, observe your dashboard lights and gauges while driving around for a few minutes. Dimming lights can be an indicator of potential issues with power distribution from the alternator.
Take note of how quickly your vehicle starts after being off for a while; slow starts might signal trouble returning in terms of electrical supply from your newly installed alternator.
Conclusion
Successfully removing and installing the Suzuki Swift Alternator Removal can be a satisfying experience. This task not only enhances your mechanical skills but also saves you money on labour costs at the garage. With patience and attention to detail, even novice DIY enthusiasts can tackle this job with confidence. Equipped with the right tools and knowledge, you’re now ready to take action. As you go through each step, remember that every car has its quirks. If something doesn’t seem right, don’t hesitate to take a moment to reassess your approach. Regular maintenance is essential for keeping your Suzuki Swift running smoothly. Understanding how components like the alternator function will empower you as an owner and driver. This knowledge helps in diagnosing issues early before they escalate into costly repairs.
FAQs
What tools are required for removing the Suzuki Swift Alternator Removal?
You will need basic hand tools, such as sockets, wrenches, screwdrivers, and pliers. A torque wrench can be beneficial for reinstallation. Having a multimeter on hand is also helpful in testing the new Suzuki Swift Alternator Removal functionality.
How long does it take to remove an alternator from a Suzuki Swift?
The time required varies depending on experience but typically ranges from one to three hours. Taking your time ensures that each step is completed correctly.
Are there any specific safety precautions I should take to ensure my safety?
Absolutely! Always disconnect the battery before starting work. Wear safety glasses to protect against debris and gloves to prevent cuts or burns when handling metal components.
| Related Business Listings |